最近開始把保固內的物品一一送修,其實有個念頭再買一個新的就好,但能用的為何不把它修好,其實工業化的現在,買一個新的有時候比維修更便宜,製造是由無情的機器與產線而出,但維修則是透過人力,寄送與等待花的時間往往更久,真的環保就是花更多的時間與金錢,讓有些微故障的東西恢復他的功能,人與物之間的關係如此,人與人之間的關係不更也是?在這分手與離婚比換電腦還頻繁的年代,更顯得諷刺。
回想起之前的文章 厭煩搬家,提到要記錄 Blog 的技術堆疊。趁著假日,來分享使用 KeystoneJS 建置 Headless CMS 的經驗。
概念
WordPress 是目前最廣泛使用的內容管理系統(CMS),提供豐富的前台樣板與簡易的後台操作,幾乎無需撰寫程式碼即可完成設定。但上次安裝 WordPress 後,後台介面讓我聯想到國中時期那種陽春的網站設計,一時手滑,誤刪了整個 Docker 容器…
Headless CMS 則不同,它專注於提供 API 供前台渲染,後台僅負責資料管理。KeystoneJS 是一款輕鬆實現 Headless CMS 需求的工具,支援自訂輸入元件,且技術堆疊令人驚喜:
- Next.js(前端框架)
- Prisma(ORM 工具)
- GraphQL(API 查詢語言)
- Apollo Server(GraphQL 伺服器)
這些技術正好是我近年學習與工作上使用的組合。只要定義模型(Model)的欄位名稱(column name)與輸入元件,並設定資料型別(data type)及關聯(relation),KeystoneJS 就能自動生成 Prisma schema,甚至連 GraphQL API 都能一氣呵成。
KeystoneJS 結構
import { config } from "@keystone-6/core";
import { lists } from "./schema";
import { withAuth, session } from "./auth";
import { local, localFile, r2Storage } from './storage'
import { server } from "./config/server";
import * as dotenv from 'dotenv'
import { db } from './config/db'
dotenv.config()
export default withAuth(
config({
db,
lists,
session,
server,
storage: {
local,
localFile,
r2Storage
},
}),
);
就這樣.....可以參考官網,他的教學是都寫在一個檔案,但多的時候管理麻煩,我通常喜歡紀錄的是概念與思路。
DB
import * as dotenv from 'dotenv'
import { DatabaseProvider, IdFieldConfig } from '@keystone-6/core/types'
dotenv.config()
export const db = {
provider: "postgresql" as DatabaseProvider,
url:
process.env.DATABASE_URL ||
"postgresql://postgres:postgres@localhost:5432/keystone",
idField: { kind: "autoincrement" } as IdFieldConfig,
}
- provider
支援database有 postgres, mysql, sqlite,我是懶惰,開了 neon - url
寫 database路徑,好習慣是寫在 .env,明碼可以寫開發用的 - idField
看你需要是用自動+1的ID,或是用UUID
List
參考 文件
- Model
ORM中的Model就是映射到database的 table,範例是用 Tag
fields
- 欄位名稱
會轉換成 database的 column name,範例用到 name, slug - 輸入Component
表面看起來是指定輸入的UI,事實上它抽象的使用在 database的 data type , 範例用到 text, relationship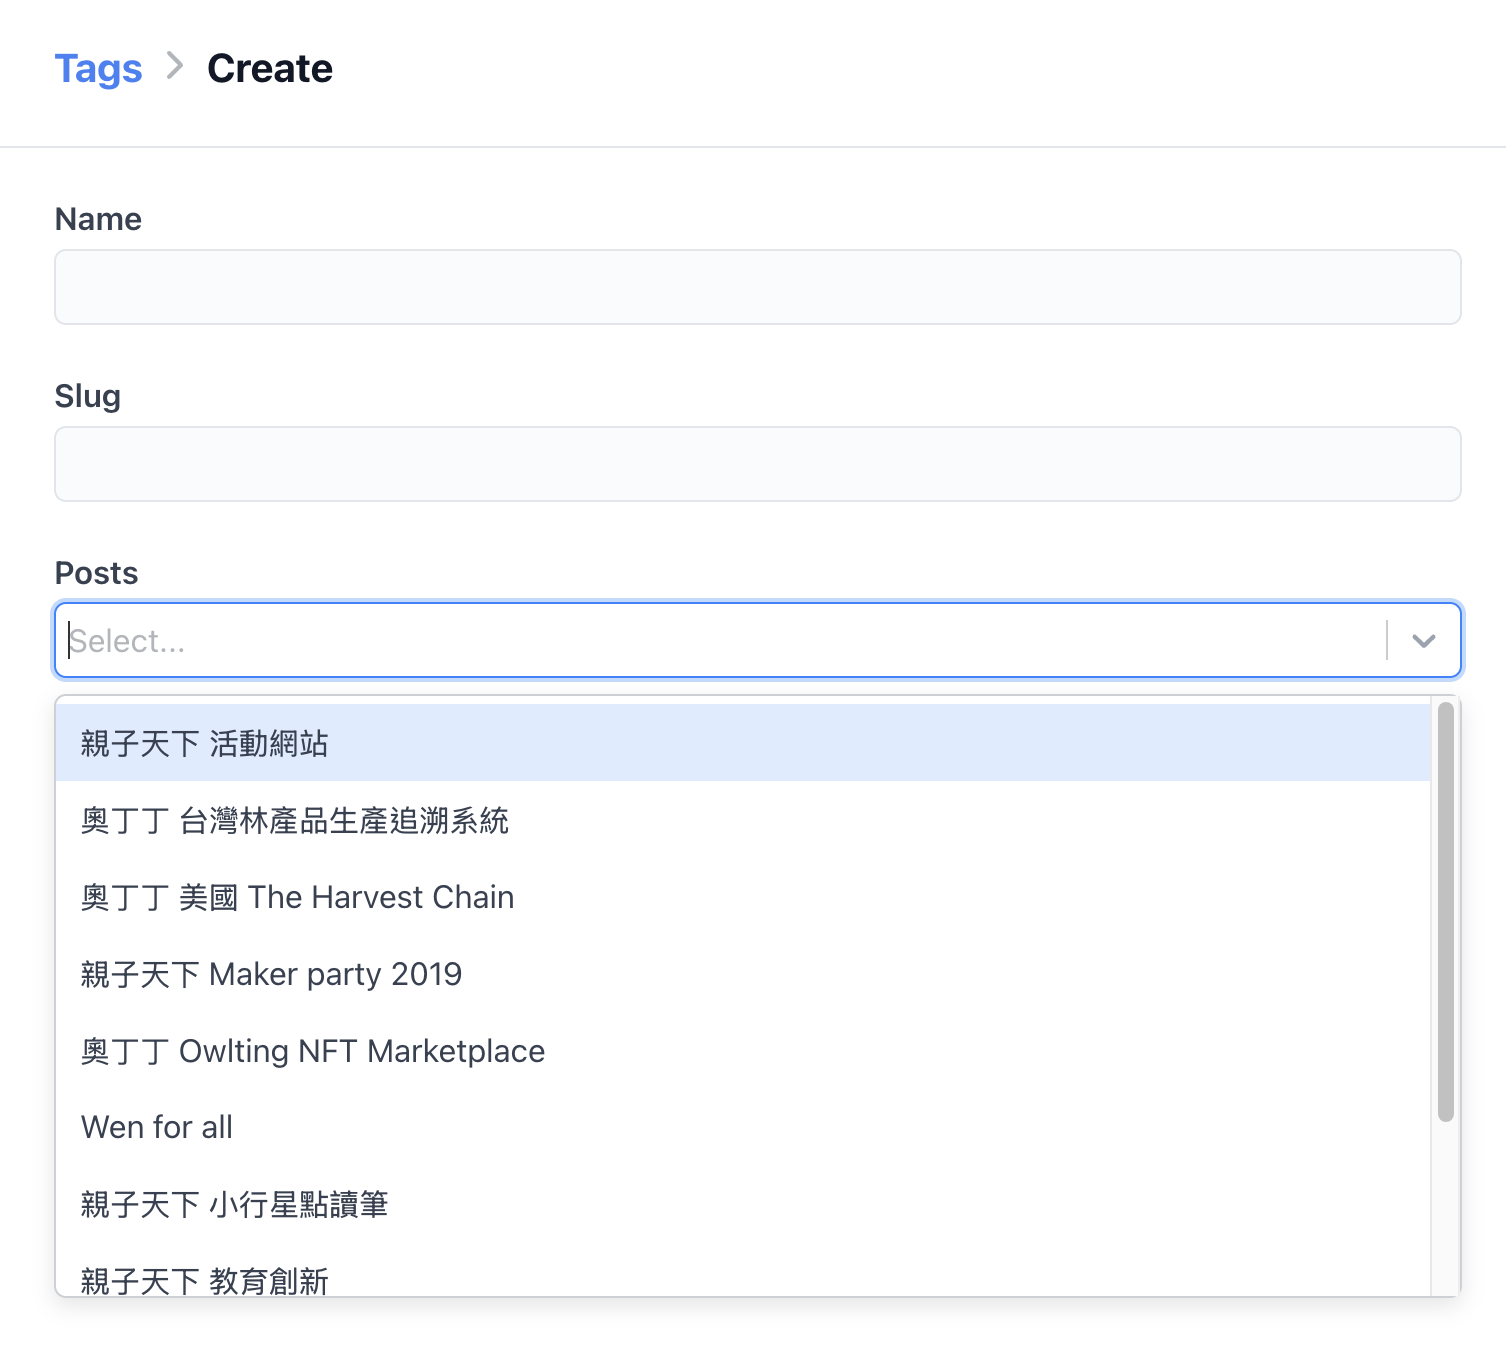
access
顧名思義就是設定權限,範例的內容:qeury 允許 所有內外部查詢,其他就限定可以登入的使用者與管理者
ui
定義
- searchFields
可以搜尋name, slug欄位 - listView
列表呈現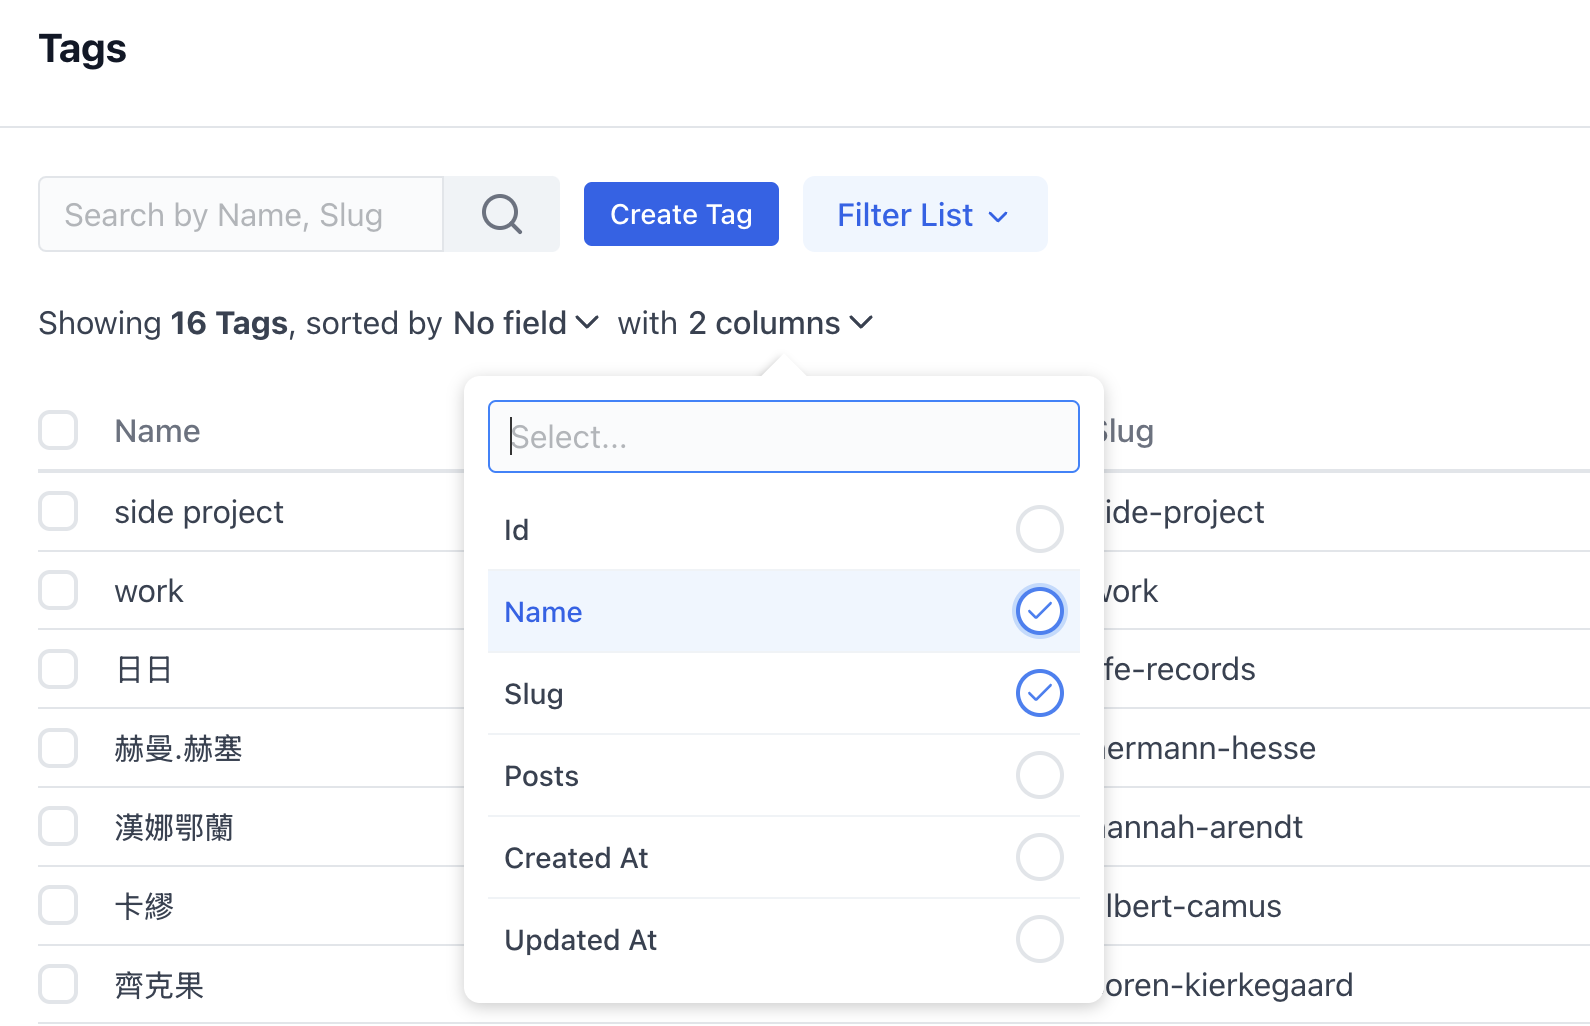
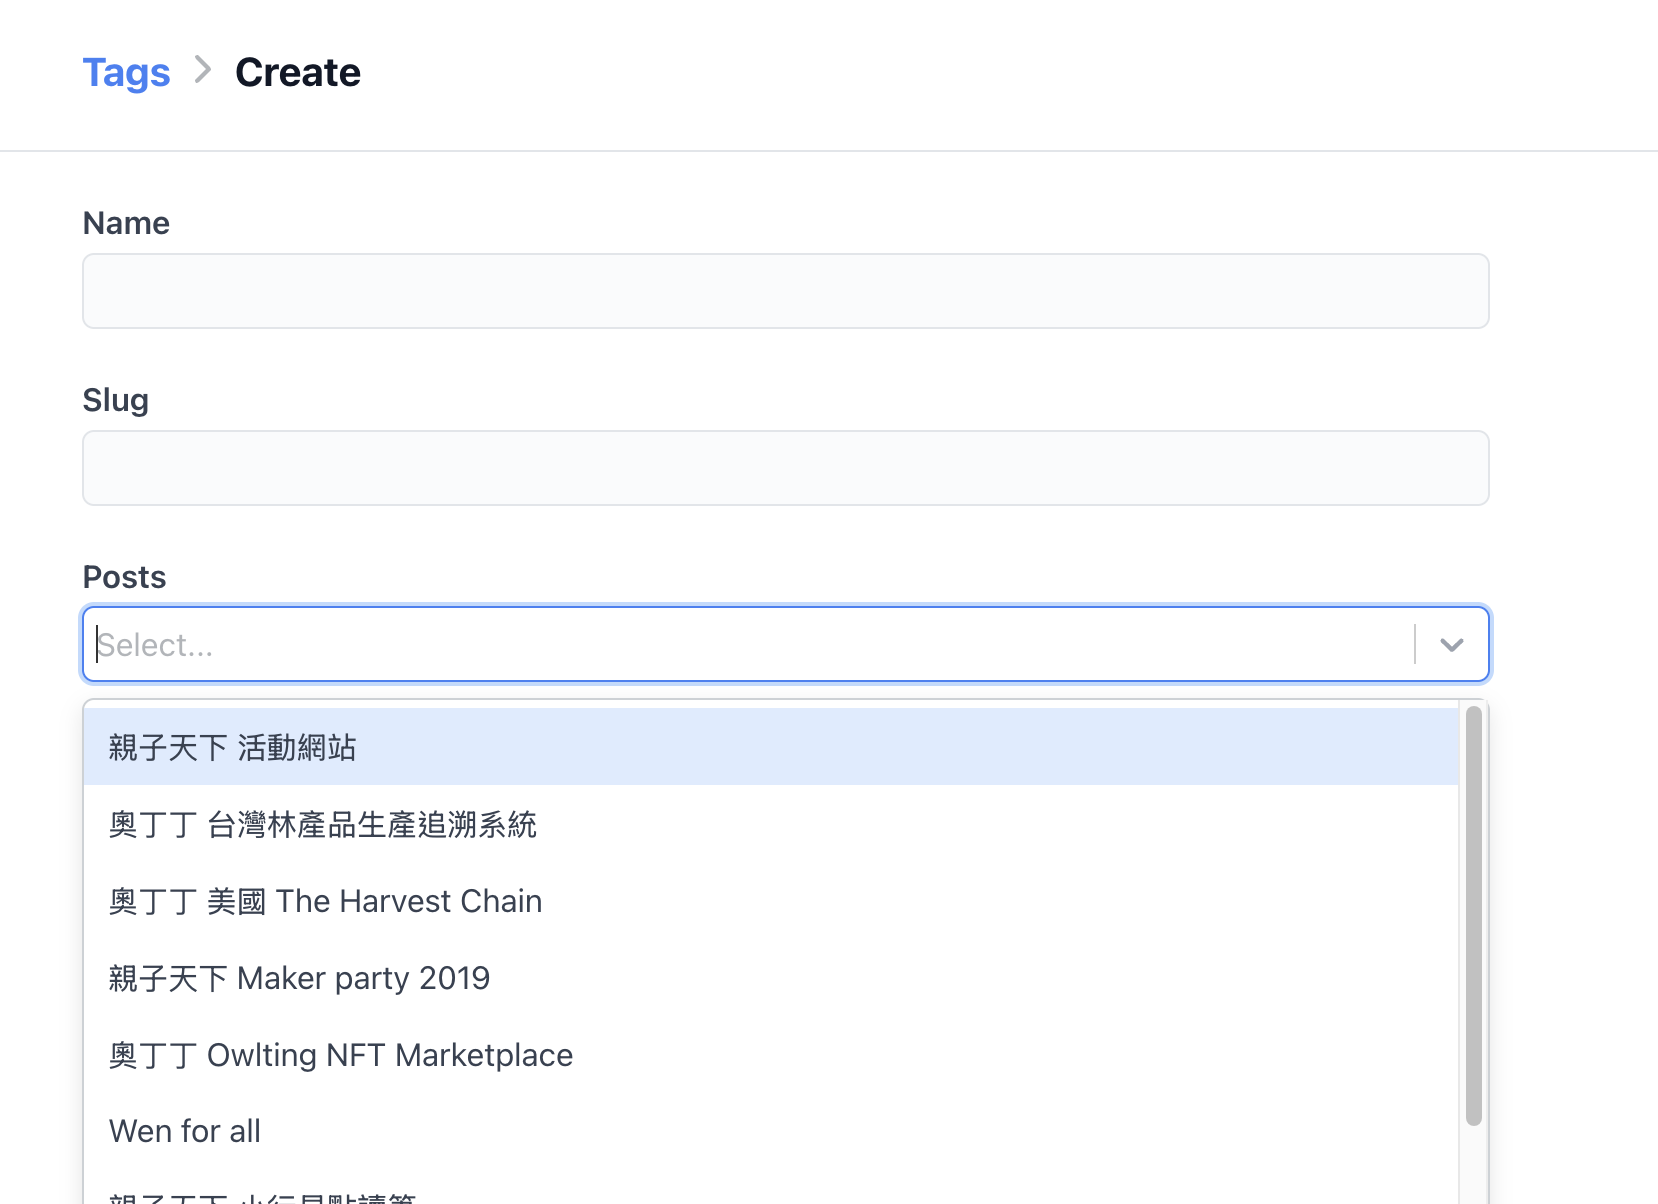 name, slug欄位
import {list} from '@keystone-6/core'
import {allowAll} from '@keystone-6/core/access'
import {relationship, text} from '@keystone-6/core/fields'
import createdAt from "../fields/createdAt";
import updatedAt from "../fields/updatedAt";
const Tag = list({
access: {
operation: {
query: allowAll,
create: ({ session }) => Boolean(session?.data.id),
update: ({ session }) => Boolean(session?.data.isAdmin),
delete: ({ session }) => Boolean(session?.data.isAdmin),
},
},
fields: {
name: text({
isIndexed: 'unique',
validation: {
isRequired: true,
},
}),
slug: text({
isIndexed: 'unique',
validation: {
isRequired: true,
match: {
regex: /^[0-9a-z-]+$/,
explanation: 'Only lowercase alphanumeric characters and hyphens are allowed.',
}
},
}),
posts: relationship({
ref: 'Post.tags',
many: true,
}),
createdAt,
updatedAt,
},
ui: {
searchFields: ['name', 'slug'],
listView: {
initialColumns: ['name', 'slug'],
},
},
})
export default Tag
Session
幾乎原裝不動,如果你想從seesion取得其他資料可以透過設定:
...
sessionData: 'id name createdAt isAdmin',
...
import { createAuth } from '@keystone-6/auth'
import { statelessSessions } from '@keystone-6/core/session'
const { withAuth } = createAuth({
listKey: 'User',
identityField: 'email',
// this is a GraphQL query fragment for fetching what data will be attached to a context.session
// this can be helpful for when you are writing your access control functions
// you can find out more at https://keystonejs.com/docs/guides/auth-and-access-control
sessionData: 'id name createdAt isAdmin',
secretField: 'password',
// WARNING: remove initFirstItem functionality in production
// see https://keystonejs.com/docs/config/auth#init-first-item for more
initFirstItem: {
// if there are no items in the database, by configuring this field
// you are asking the Keystone AdminUI to create a new user
// providing inputs for these fields
fields: ['name', 'email', 'password'],
// it uses context.sudo() to do this, which bypasses any access control you might have
// you shouldn't use this in production
},
})
// statelessSessions uses cookies for session tracking
// these cookies have an expiry, in seconds
// we use an expiry of 30 days for this starter
const sessionMaxAge = 60 * 60 * 24 * 30
// you can find out more at https://keystonejs.com/docs/apis/session#session-api
const session = statelessSessions({
maxAge: sessionMaxAge,
secret: process.env.SESSION_SECRET,
})
export { withAuth, session }
Server (optional)
這個是選項,因為我有做一個客製化的component來寫 markdown,所以需要API來上傳檔案,因為啟用的時候,我都是放在本機上,忘記寫token驗證,要上線的話一定要加。
這個是使用s3相容的bucket,來存放檔案。
import { Express } from "express";
import multer from "multer";
import * as dotenv from 'dotenv'
import { PutObjectCommand, S3Client } from '@aws-sdk/client-s3'
import { createHash } from 'crypto';
dotenv.config()
const upload = multer({ storage: multer.memoryStorage() });
const s3Client = new S3Client({
region: process.env.R2_REGION ?? "auto",
endpoint: process.env.R2_ENDPOINT,
credentials: {
accessKeyId: process.env.R2_ACCESS_KEY_ID ?? '',
secretAccessKey: process.env.R2_SECRET_ACCESS ?? '',
},
});
function getStringHash(content: Buffer, algorithm = 'sha256') {
return createHash(algorithm).update(content).digest('hex');
}
const extendExpressApp = (app: Express) => {
app.post("/api/upload", upload.single("file"), async (req, res) => {
const file = req.file;
if (!file) {
res.status(400).send("No file uploaded");
return;
}
const fileName = getStringHash(file.buffer) + file.mimetype.replace('image/', '.')
const command = new PutObjectCommand({
Bucket: process.env.R2_BUCKET ?? 'blog-dev',
Key: `images/${fileName}`,
Body: file.buffer,
});
const response = await s3Client.send(command);
if (response.$metadata.httpStatusCode !== 200) {
res.status(500).send("Upload failed");
return;
}
res.status(200).json({
url: `${process.env.R2_API_ENDPOINT}/images/${fileName}`,
});
});
};
export const server = {
cors: { origin: "*" },
port: +(process.env.KEYSTONE_PORT ?? 8000),
extendExpressApp,
};
Storage
這個設定是為了使用在 Image 或 File時的抽象化設定,我使用的時免費仔愛用的Cloudflare R2。
import type { StorageConfig } from "@keystone-6/core/types";
import * as dotenv from 'dotenv'
dotenv.config()
export const local: StorageConfig = {
kind: "local",
type: "image",
generateUrl: (path) =>
`${process.env.KEYSTONE_BASE_URL}:${process.env.KEYSTONE_PORT ?? 8000}/images${path}`,
serverRoute: {
path: "/images",
},
storagePath: "public/images",
};
export const localFile: StorageConfig = {
kind: "local",
type: "file",
generateUrl: (path) =>
`${process.env.KEYSTONE_BASE_URL}:${process.env.KEYSTONE_PORT ?? 8000}/files${path}`,
serverRoute: {
path: "/files",
},
storagePath: "public/files",
};
export const r2Storage: StorageConfig = {
kind: "s3",
type: "image",
pathPrefix: 'images/',
generateUrl: (path: string) => {
const file = path.split('/').pop()
return process.env.R2_API_ENDPOINT + '/images/' + file
},
bucketName: process.env.R2_BUCKET ?? 'blog-dev', // from your S3_BUCKET_NAME environment variable
region: process.env.R2_REGION ?? "auto", // from your S3_REGION environment variable
accessKeyId: process.env.R2_ACCESS_KEY_ID, // from your S3_ACCESS_KEY_ID environment variable
secretAccessKey: process.env.R2_SECRET_ACCESS, // from your S3_SECRET_ACCESS_KEY environment variable
endpoint: process.env.R2_ENDPOINT, // from your S3_ENDPOINT environment variable
acl: "public-read", // from your S3_ACL environment variable
};
成果
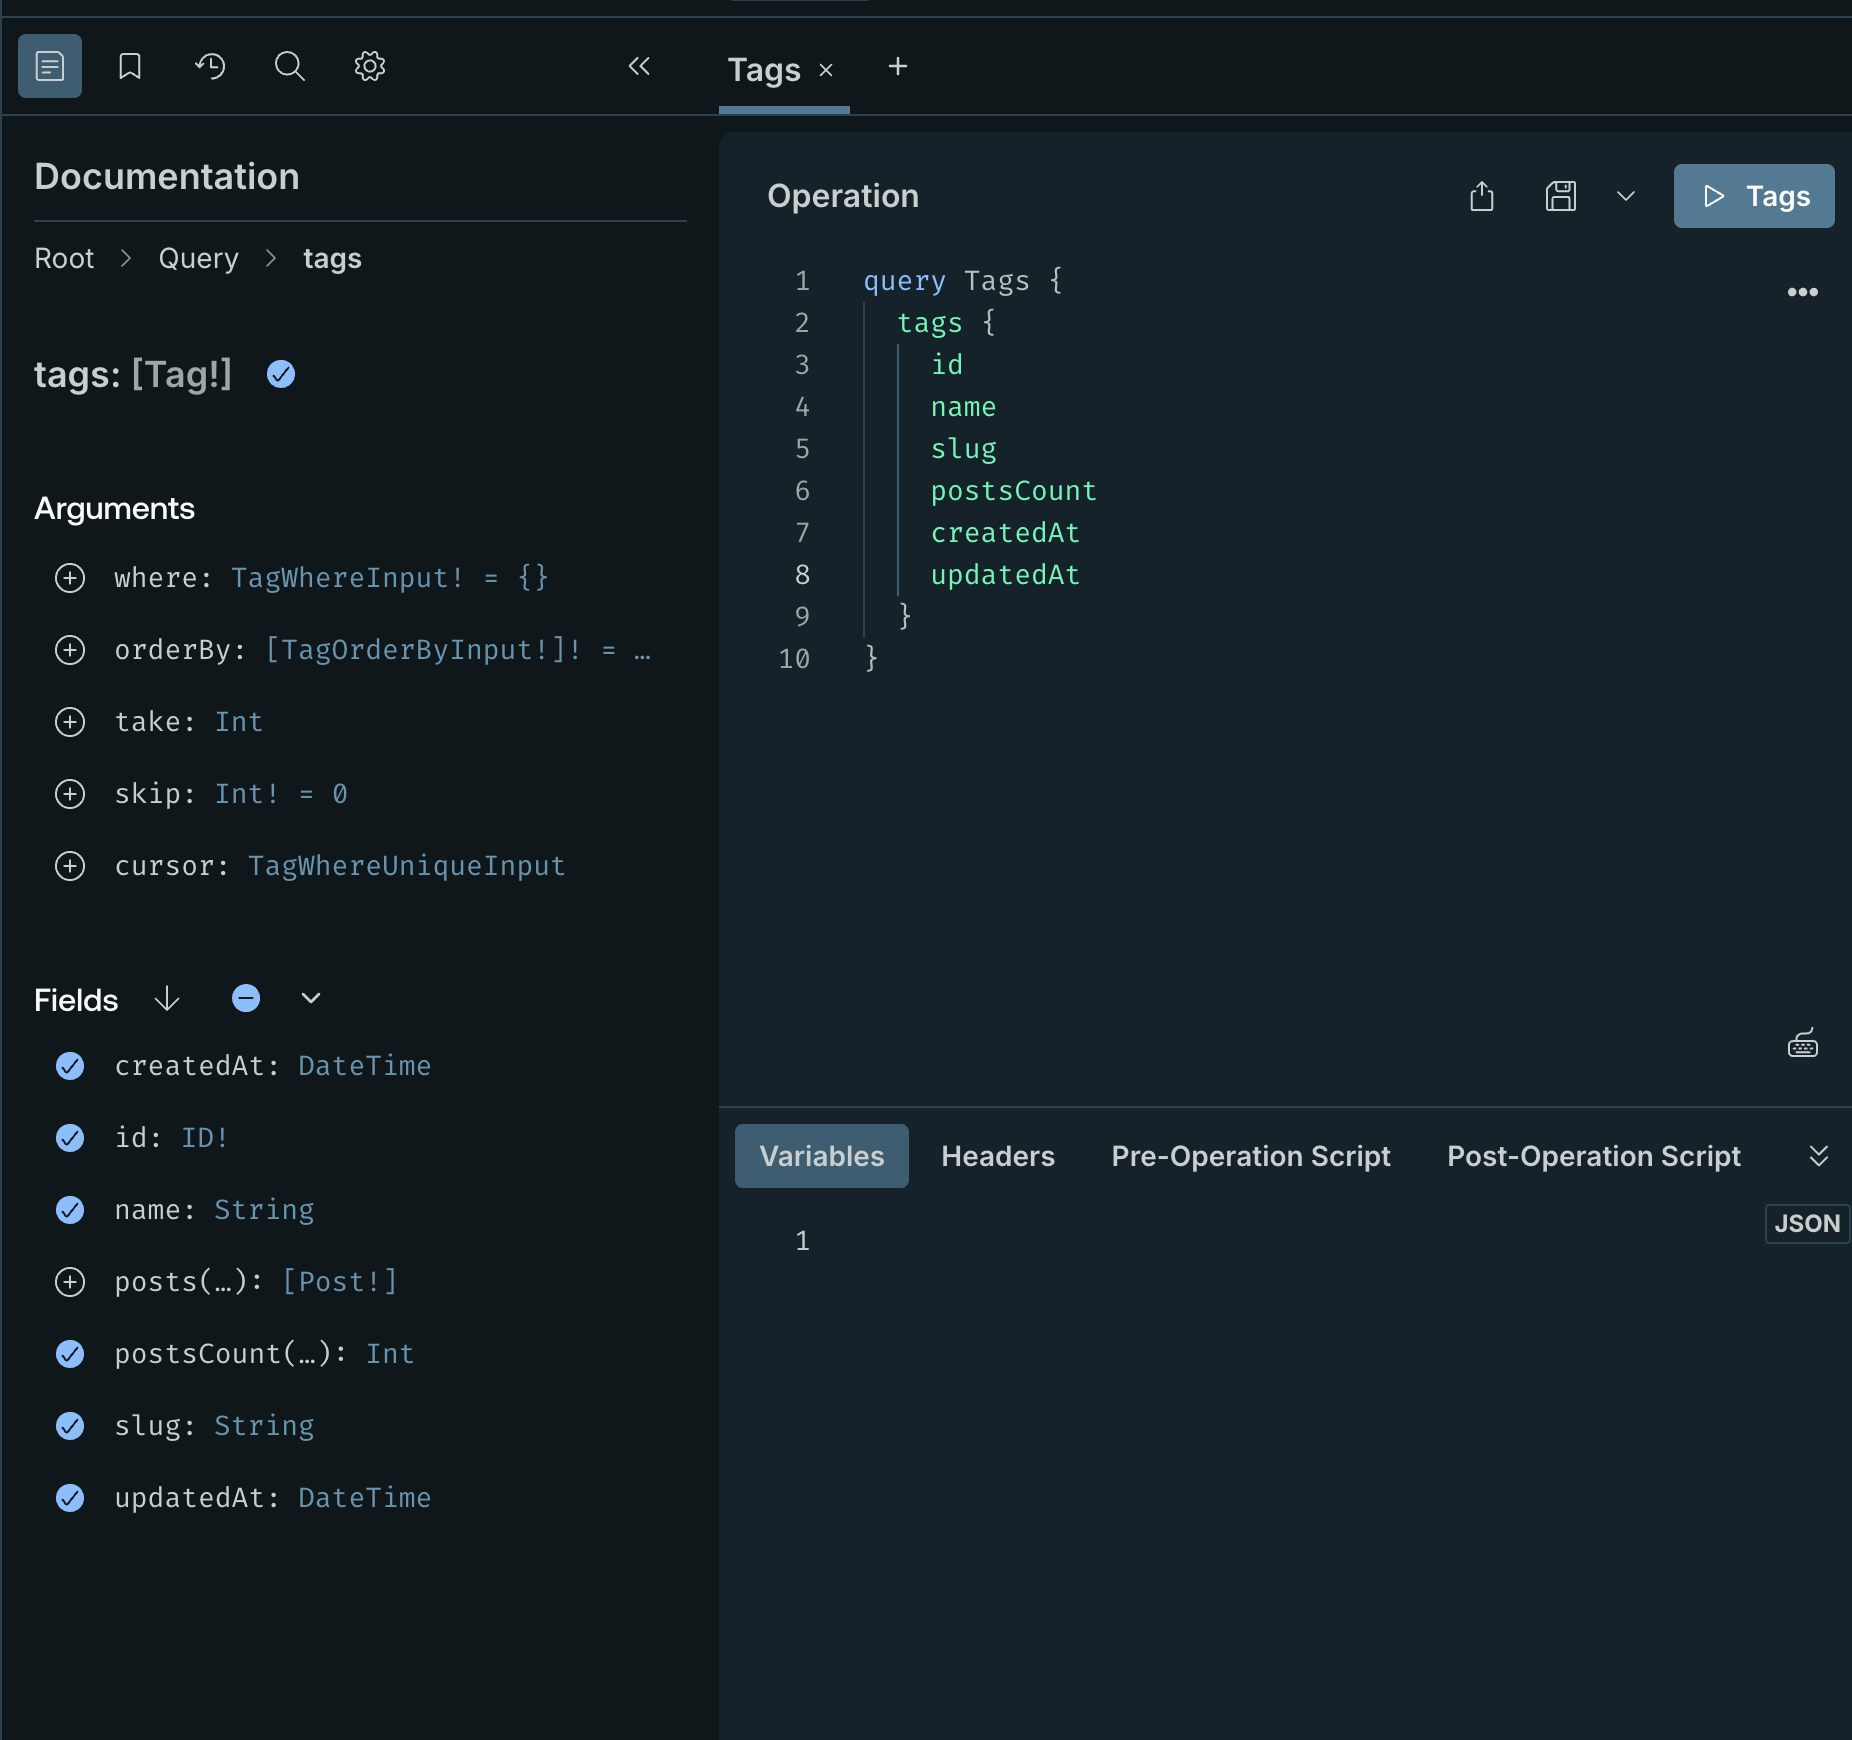
整個headless CMS 的 graphql全部幫你寫完.....(抖)
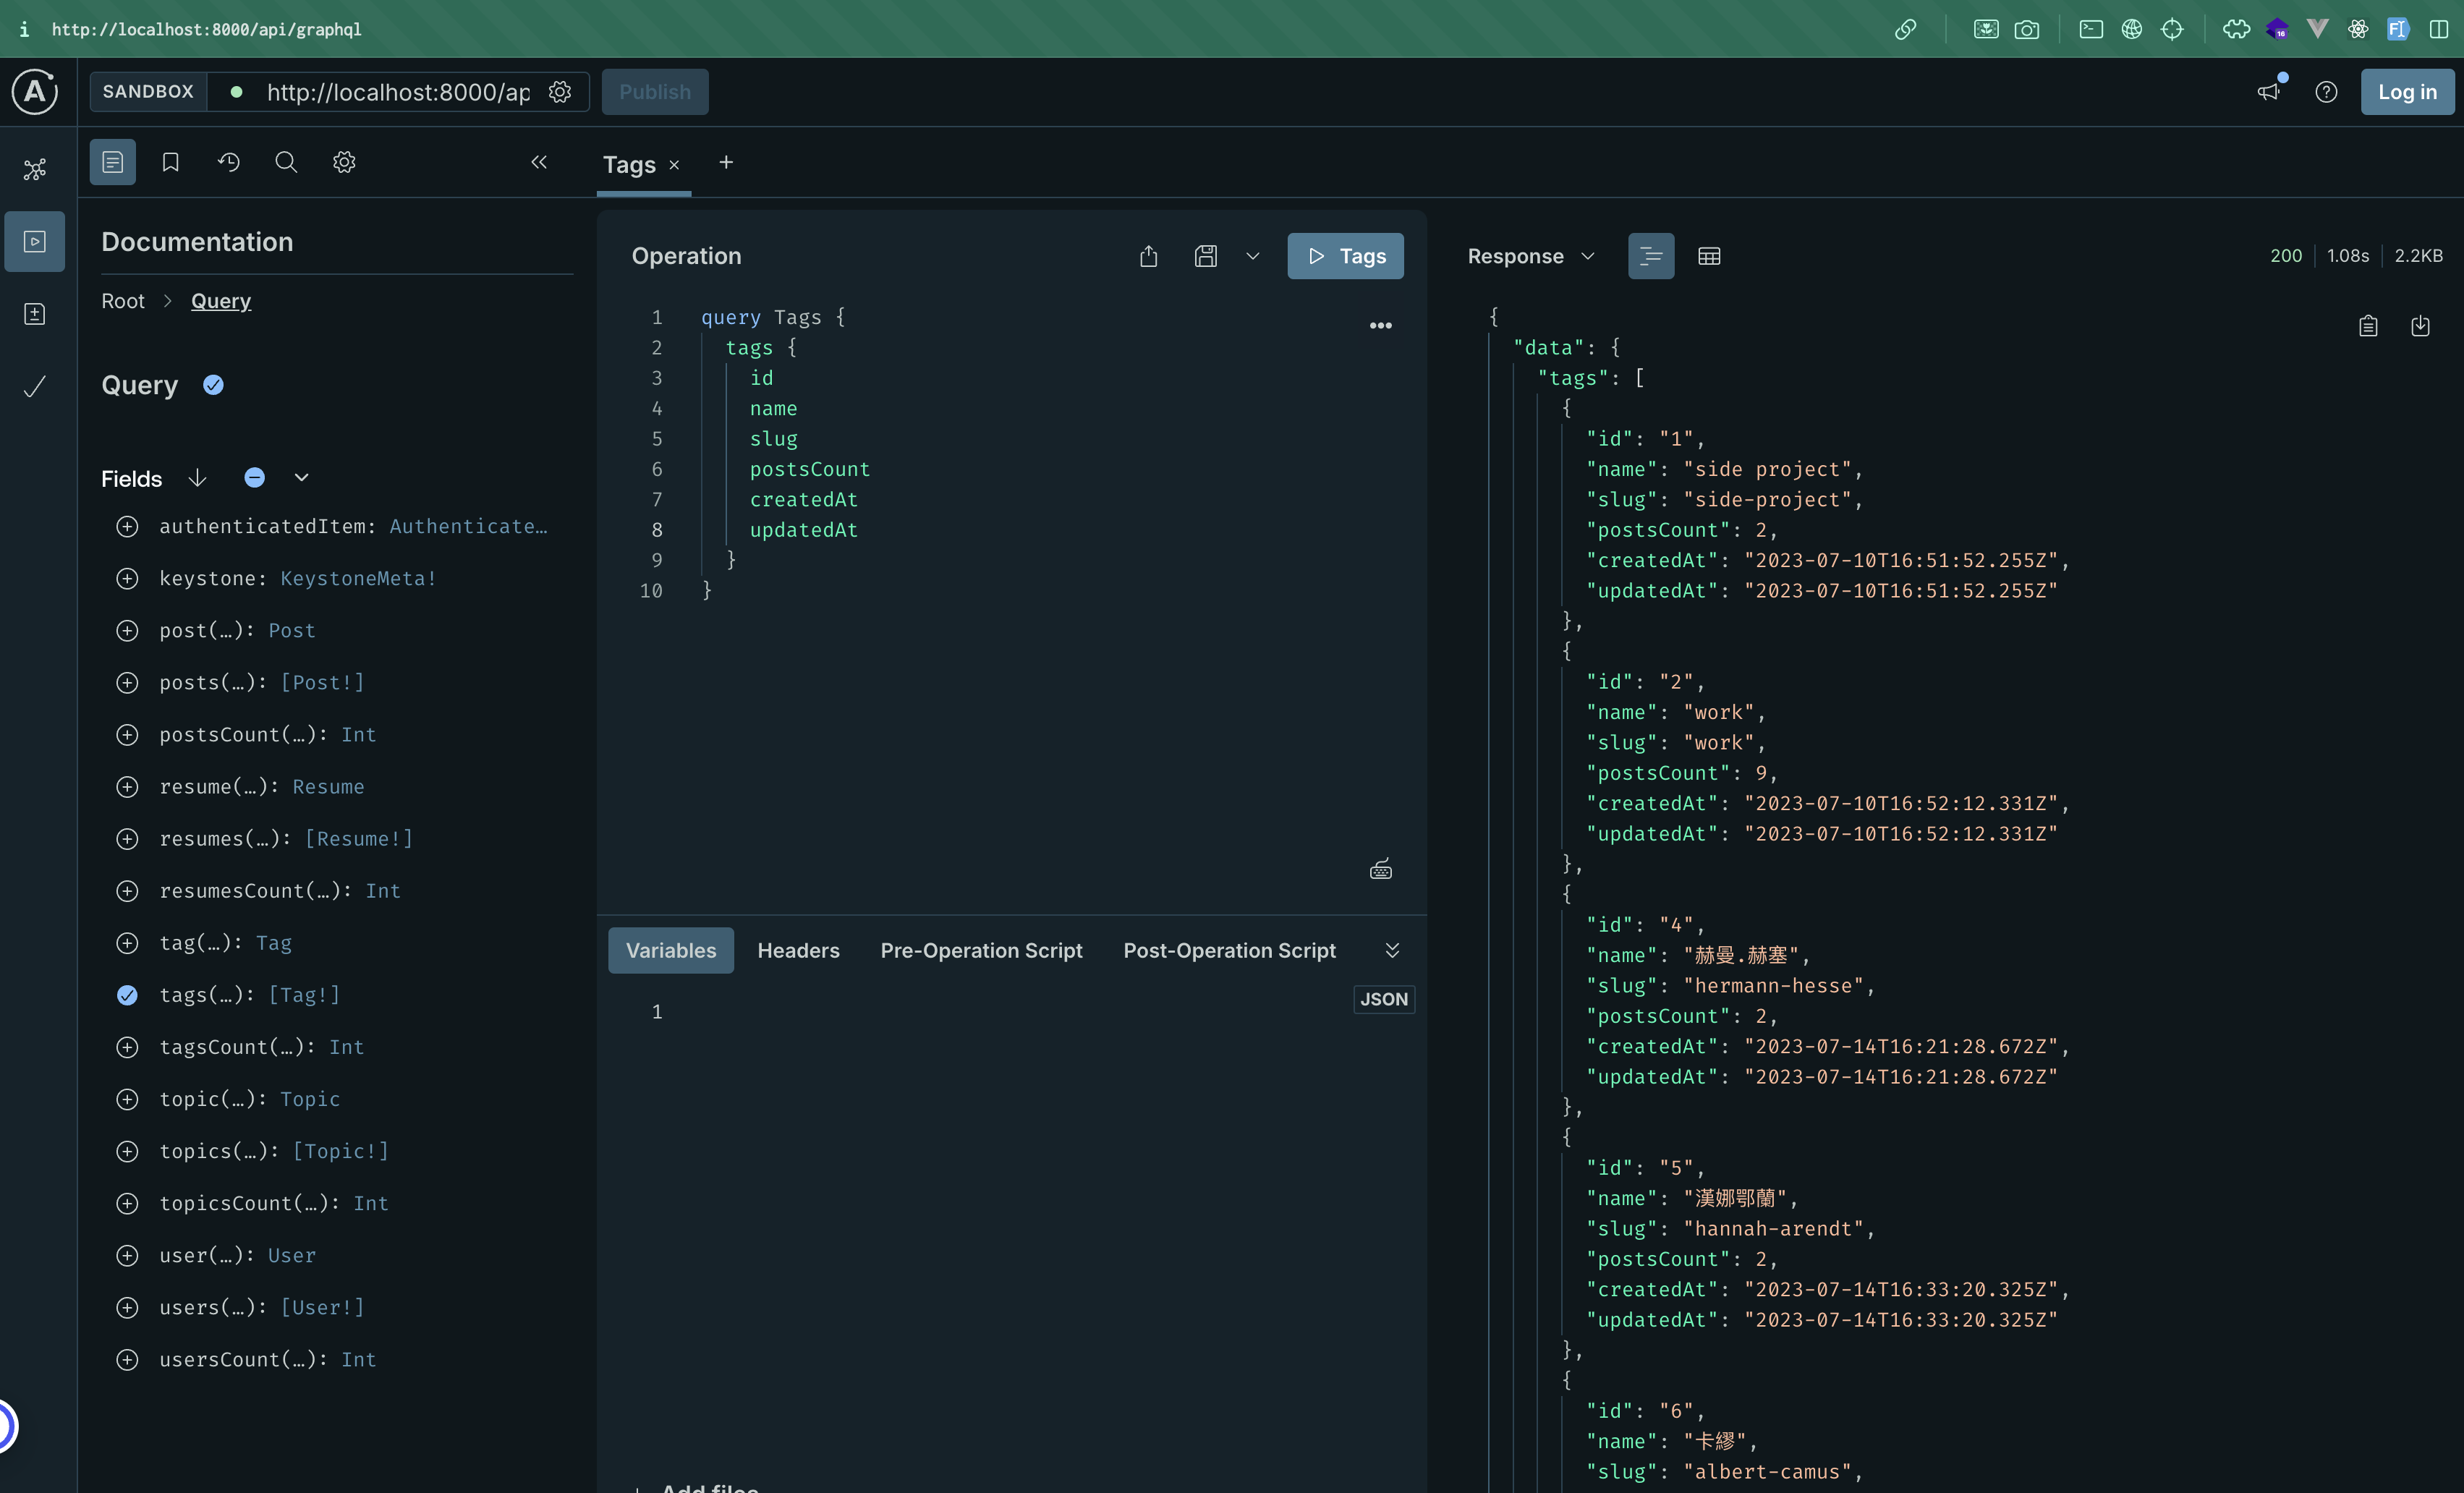
然後他連各種filter都寫好了.....自己點一點args
結語
沒做到step by step都寫得好久....,當除本來是在前前家公司要做年度KPI對內部的教育訓練分享技術,因為公司沒在用PHP,本來是用Laravel寫的,結果整個打掉重寫,意外的找到這個好東西,如果有用過nestjs寫過graphql,就知道搞這些參數有多麻煩,雖然用 prisma寫orm超舒服,但也不會比寫一個config就能長出整個網站開心,但他也是有他的限制,怎麼樣使用,就得自己摸索。
文字工作者,寫作時間常常在人類與電腦之間拉鋸,相信閱讀,相信文字與思想所構築的美麗境界