繼續上一篇...優雅的三拍,寫好API - elysiajs,當時一下手寫太多,缺少了 swagger 文件生成、 request validation 與 response。
swagger
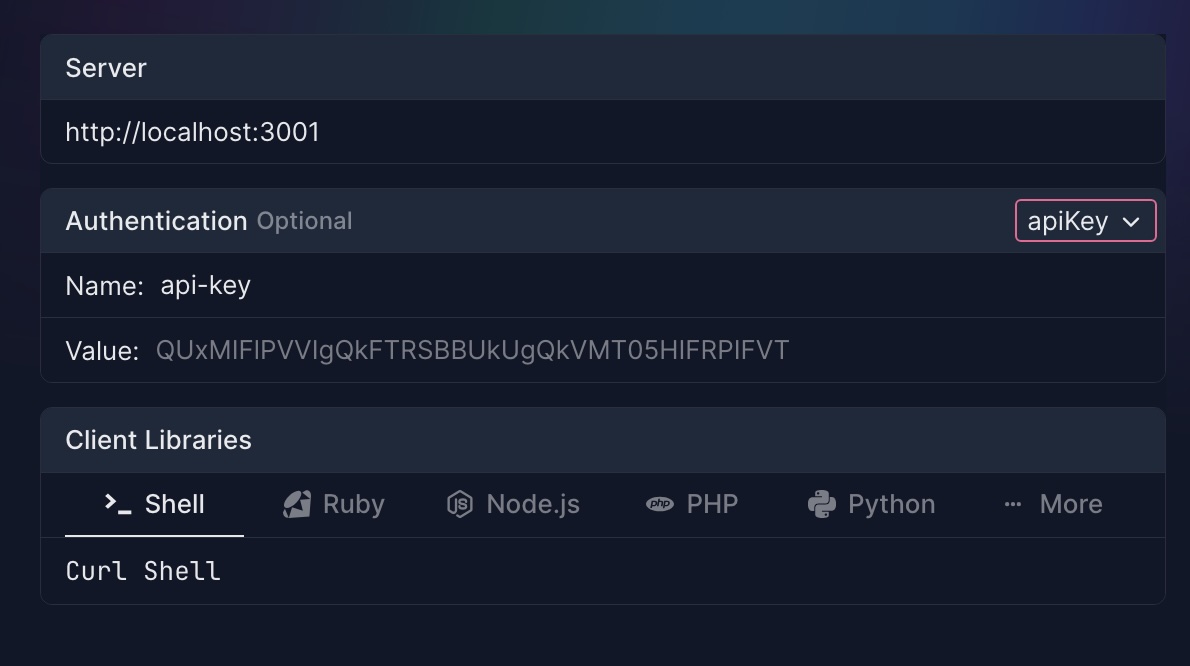
算是基於 openapi的標準,在 rest API 可以透過寫 input 與 output的格式,同時完成 request與 response的文件內容與格式驗證,而且同時可以發出 request,可以取代postman,是現代後端框架蠻多必備的應用。
import cors from "@elysiajs/cors";
import swagger from "@elysiajs/swagger";
import { Elysia } from "elysia";

const app = new Elysia()
  .use(cors())
  .use(
    swagger({
      documentation: {
        tags: [{ name: "Auth", description: "Authentication endpoints" }],
        info: {
          title: "Oauth API",
          version: "1.0.0",
        },
        components: {
          securitySchemes: {
            adminAuth: {
              type: "http",
              scheme: "bearer",
              bearerFormat: "JWT",
            },
            userAuth: {
              type: "http",
              scheme: "bearer",
              bearerFormat: "JWT",
            },
            apiKey: {
              type: "apiKey",
              in: "header",
              name: "api-key",
            },
          },
        },
      },
      path: "/docs",
    }),
  )
當然需要先安裝套件,文件裡裡面寫的不多,但有 typescript,直接自己看原始碼猜一下比較快。
components
securitySchemes
是用來寫 驗證要代的參數,當初我也是看原始碼自己猜,猜多了很容易一次就中。
securitySchemes: {
    adminAuth: {
        type: "http",
        scheme: "bearer",
        bearerFormat: "JWT",
    },
    userAuth: {
        type: "http",
        scheme: "bearer",
        bearerFormat: "JWT",
    },
    apiKey: {
        type: "apiKey",
        in: "header",
        name: "api-key",
    },
},
就會長出來,三個不同的保護方式,可以幫助你在header自動帶入。
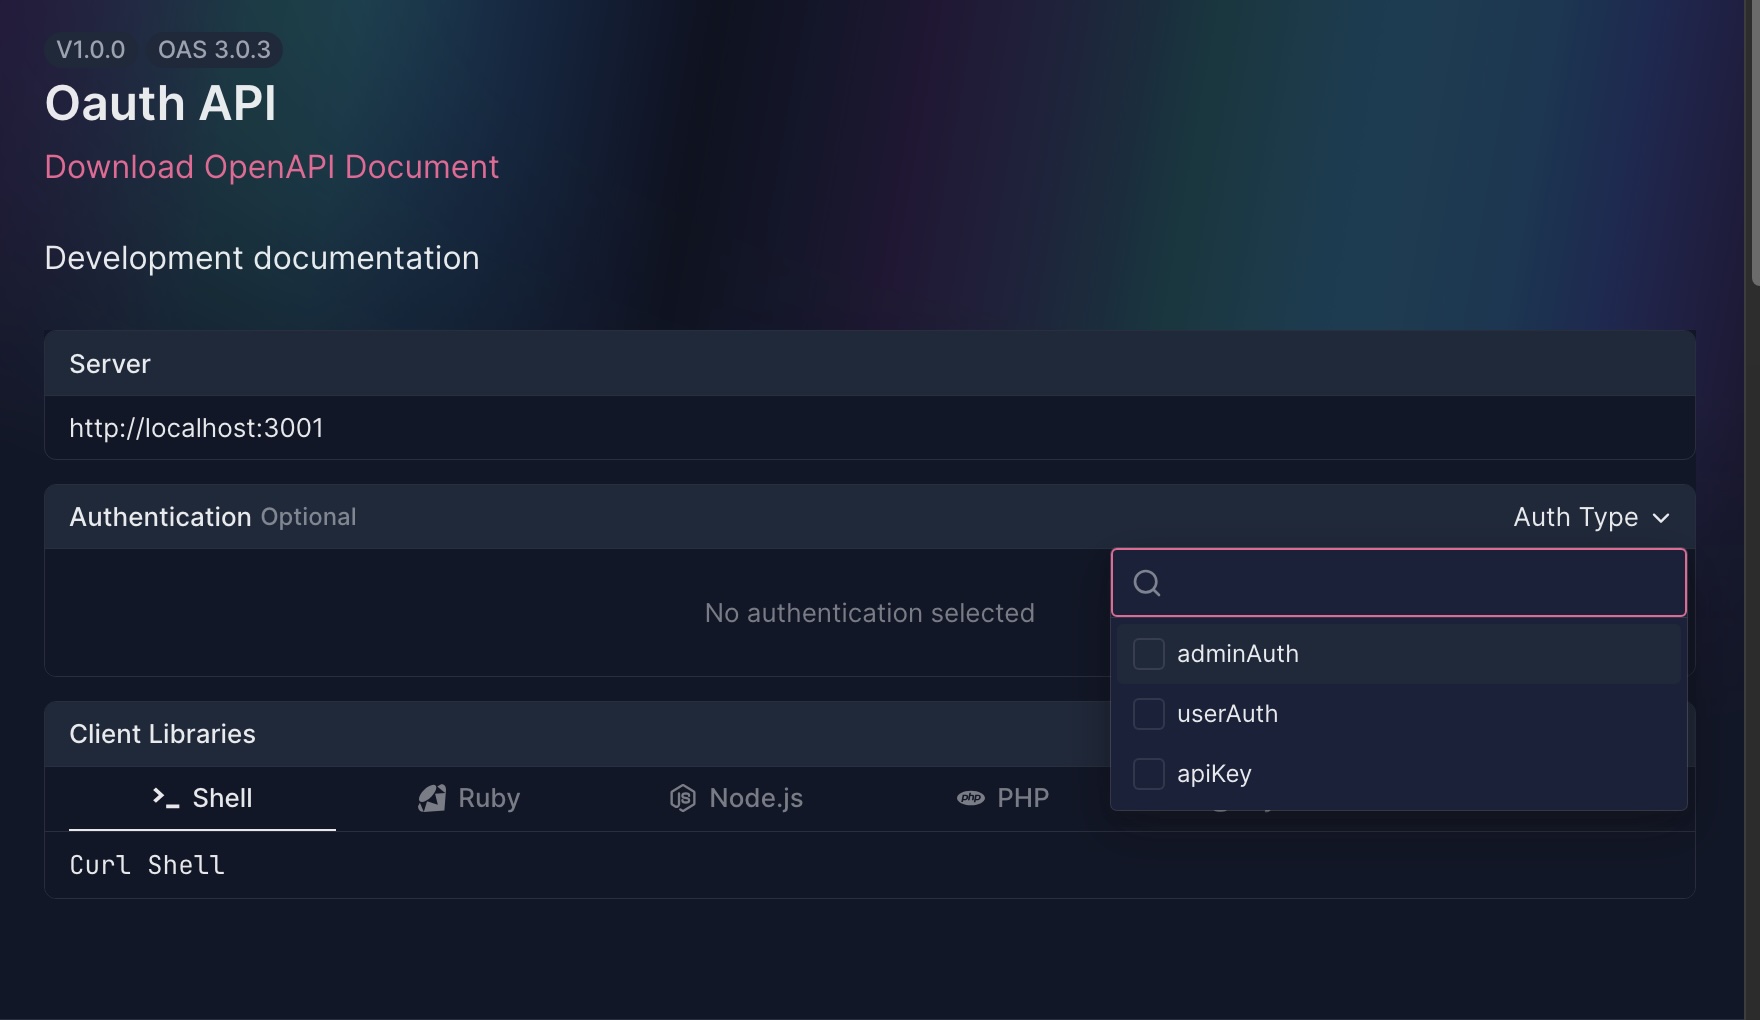
adminAuth 與 userAuth(都是自定義名稱),就是 scheme 使用 bearer,在header上幫你加上 key Authentication,這種方式比較常用在前端登入,取得一把有時效性,且有帶入不敏感資料的 payload。
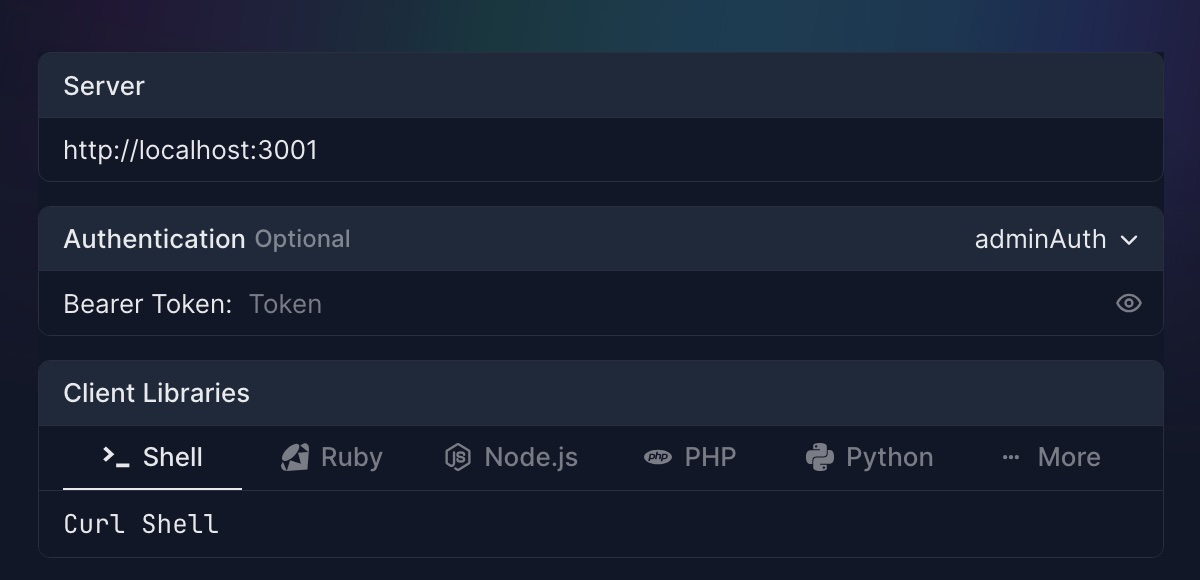
apiKey (也是自定義名稱),它的 name的值,會自動幫你在 header加入 key,這種比較常用在後端call後端,固定的 api key。
path
預設swagger的網址為 /swagger,但我比較習慣用 /docs,可以根據喜好定義。
Validation
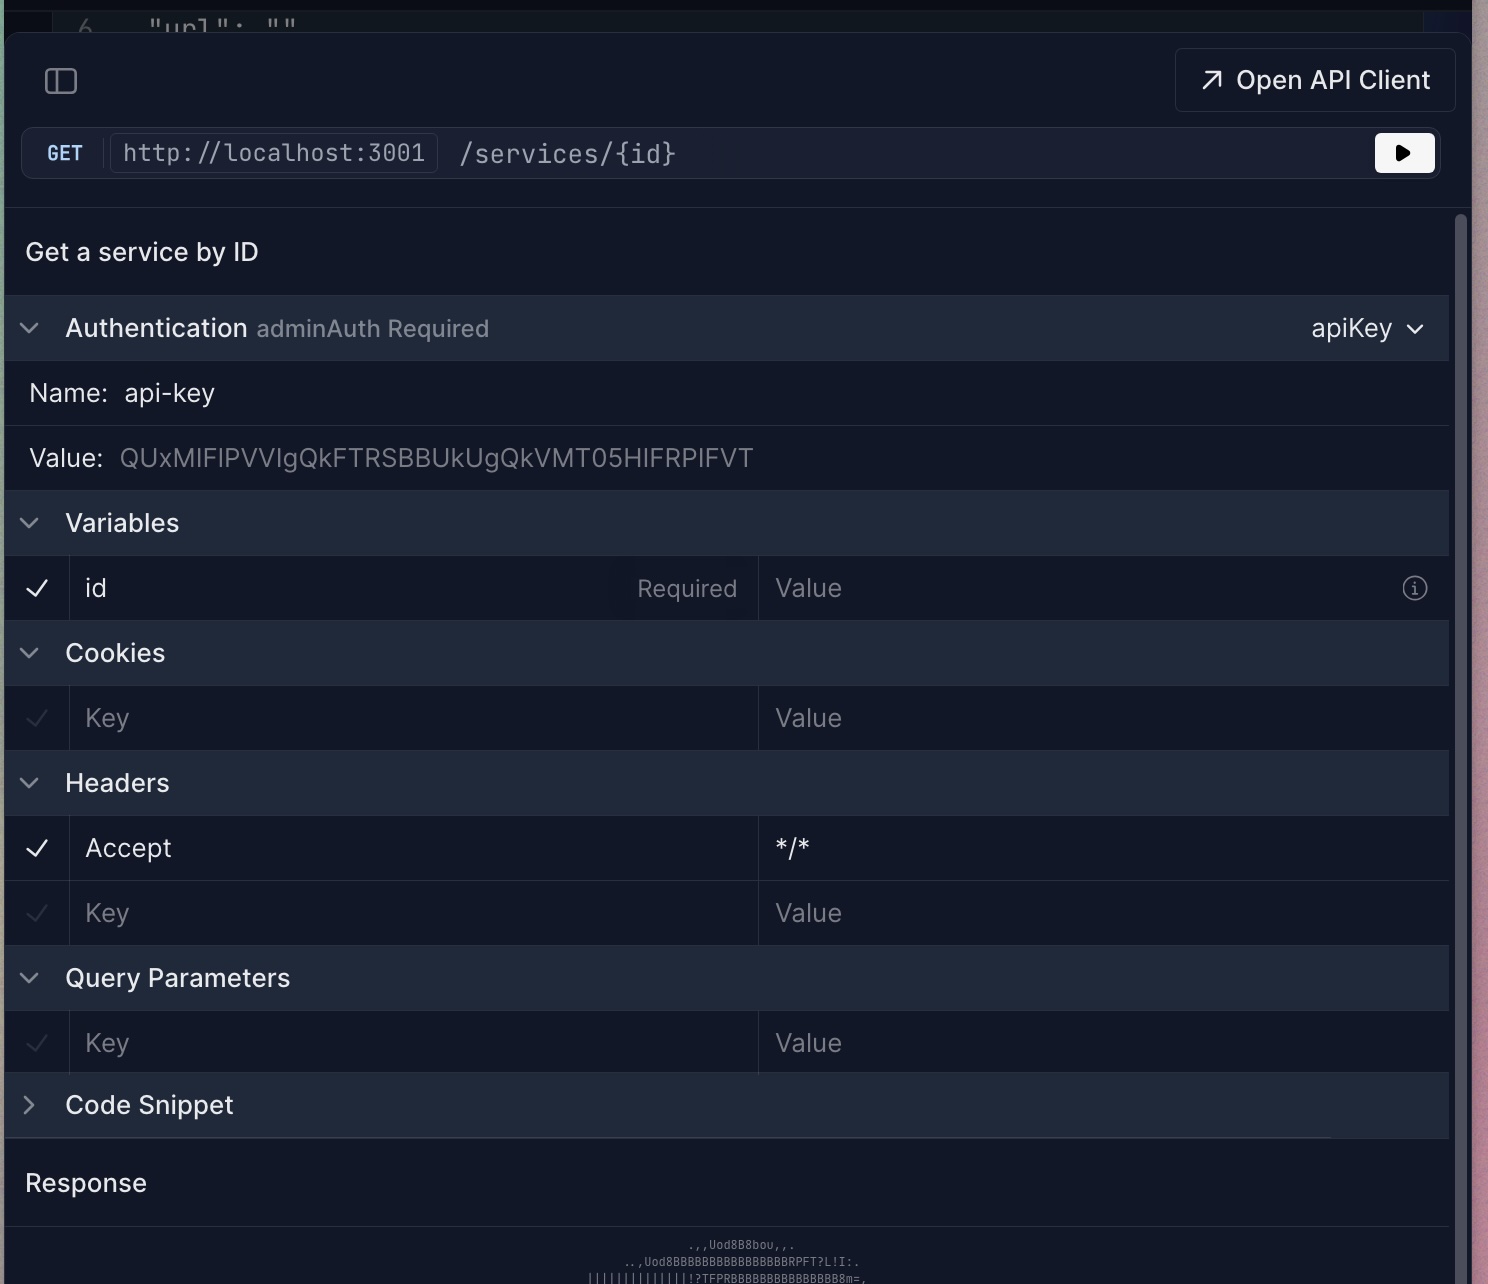
一開始也不知道怎麼分類,說他是驗證,但他同時也是在處理 routing的參數,這個寫完就同時可以產生文件了 ^^
範例
import Elysia, { error, t } from "elysia";
......
new Elysia()
.get(
    "/:id",
    async ({ params }) => {
    const { id } = params;
    // .....略
    },
    {
        detail: {
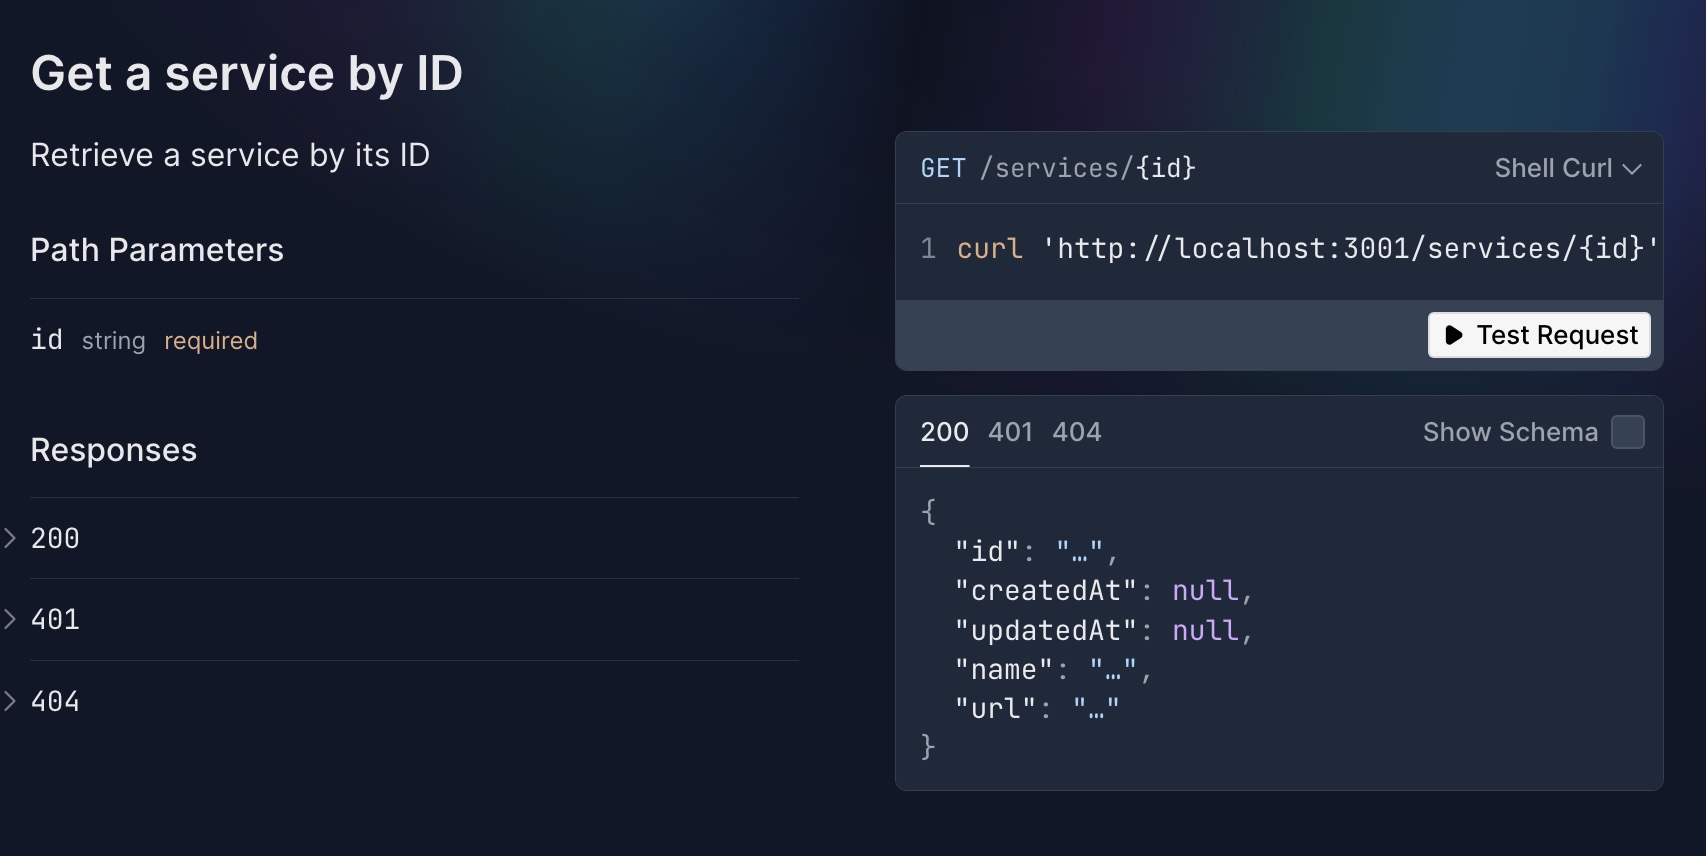
            summary: "Get a service by ID",
            description: "Retrieve a service by its ID",
            security: [
            {
                adminAuth: [],
            },
            ],
        },
        params: t.Object({
            id: t.String(),
        }),
        response: {
            200: serviceResponse,
            401: UnauthorizedResponse,
            404: NotFoundResponse,
        },
    },
)
params
基本的 route
.get(<path>, {<controller>}, {<hook>})
path
這邊用 :id 代表符合的網址路徑會用變數 id承接,透過 params.id 可以取得。
const { id } = params;
controller
第二個part就是一般的 controller角色,會把進來要做什麼事情寫這。
hook
主要先說 params,這邊用的驗證套件是 typebox,經過 Elysia包了一層,如果想瞭解 更多
params: t.Object({
        id: t.String(),
    }),
通常最外層一定是 t.Object() 表示物件,或是 t.Array() array居多,這邊的 id,對應的是 path 的 params,驗證 id是 **t.String()**字串。
query
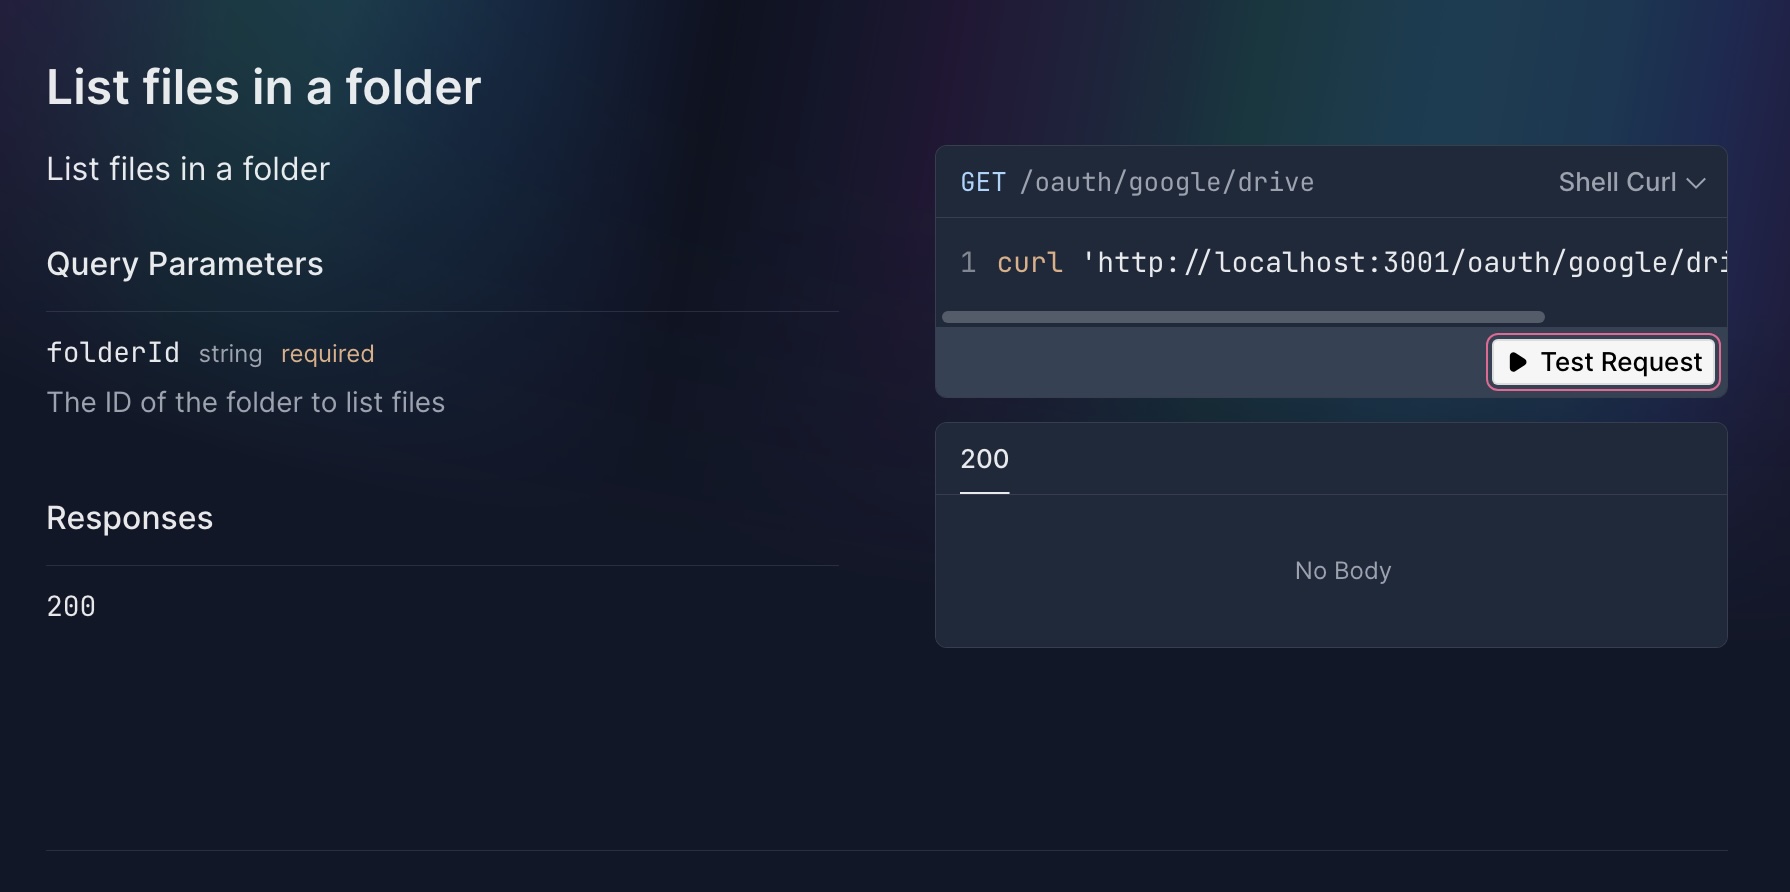
在 get下,常見的還有傳網址裡面的參數。
.get("/drive", async ({ query }) => {
    const folderId = query.folderId || "root";
    // ......略
, {
    detail: {
        summary: "List files in a folder",
        description: "List files in a folder",
    },
    query: t.Object({
        folderId: t.String({
            description: "The ID of the folder to list files",
        }),
    }),
}),
一樣在 context可以拿到 query,則在 hook一樣為他做個描述,同時驗證。
就會長出來文件
body
舉個例子
.post(
    "/",
    async ({ body, set }) => {
    set.status = 201;
    const { name, email, password } = body;
    // .....略
    },
    {
    detail: {
        summary: "Register new admin",
        description: "Use name, email, password, create a new admin",
        security: [
        {
            adminAuth: [],
        },
        ],
    },
    body: registerSchema,
    response: {
        201: createAdminResponse,
        400: BadRequestResponse,
        401: UnauthorizedResponse,
    },
})

// admin.ts

export const registerSchema = t.Object({
  name: t.String(),
  email: t.String({
    format: "email",
  }),
  password: t.String({ minLength: 8, maxLength: 10 }),
});
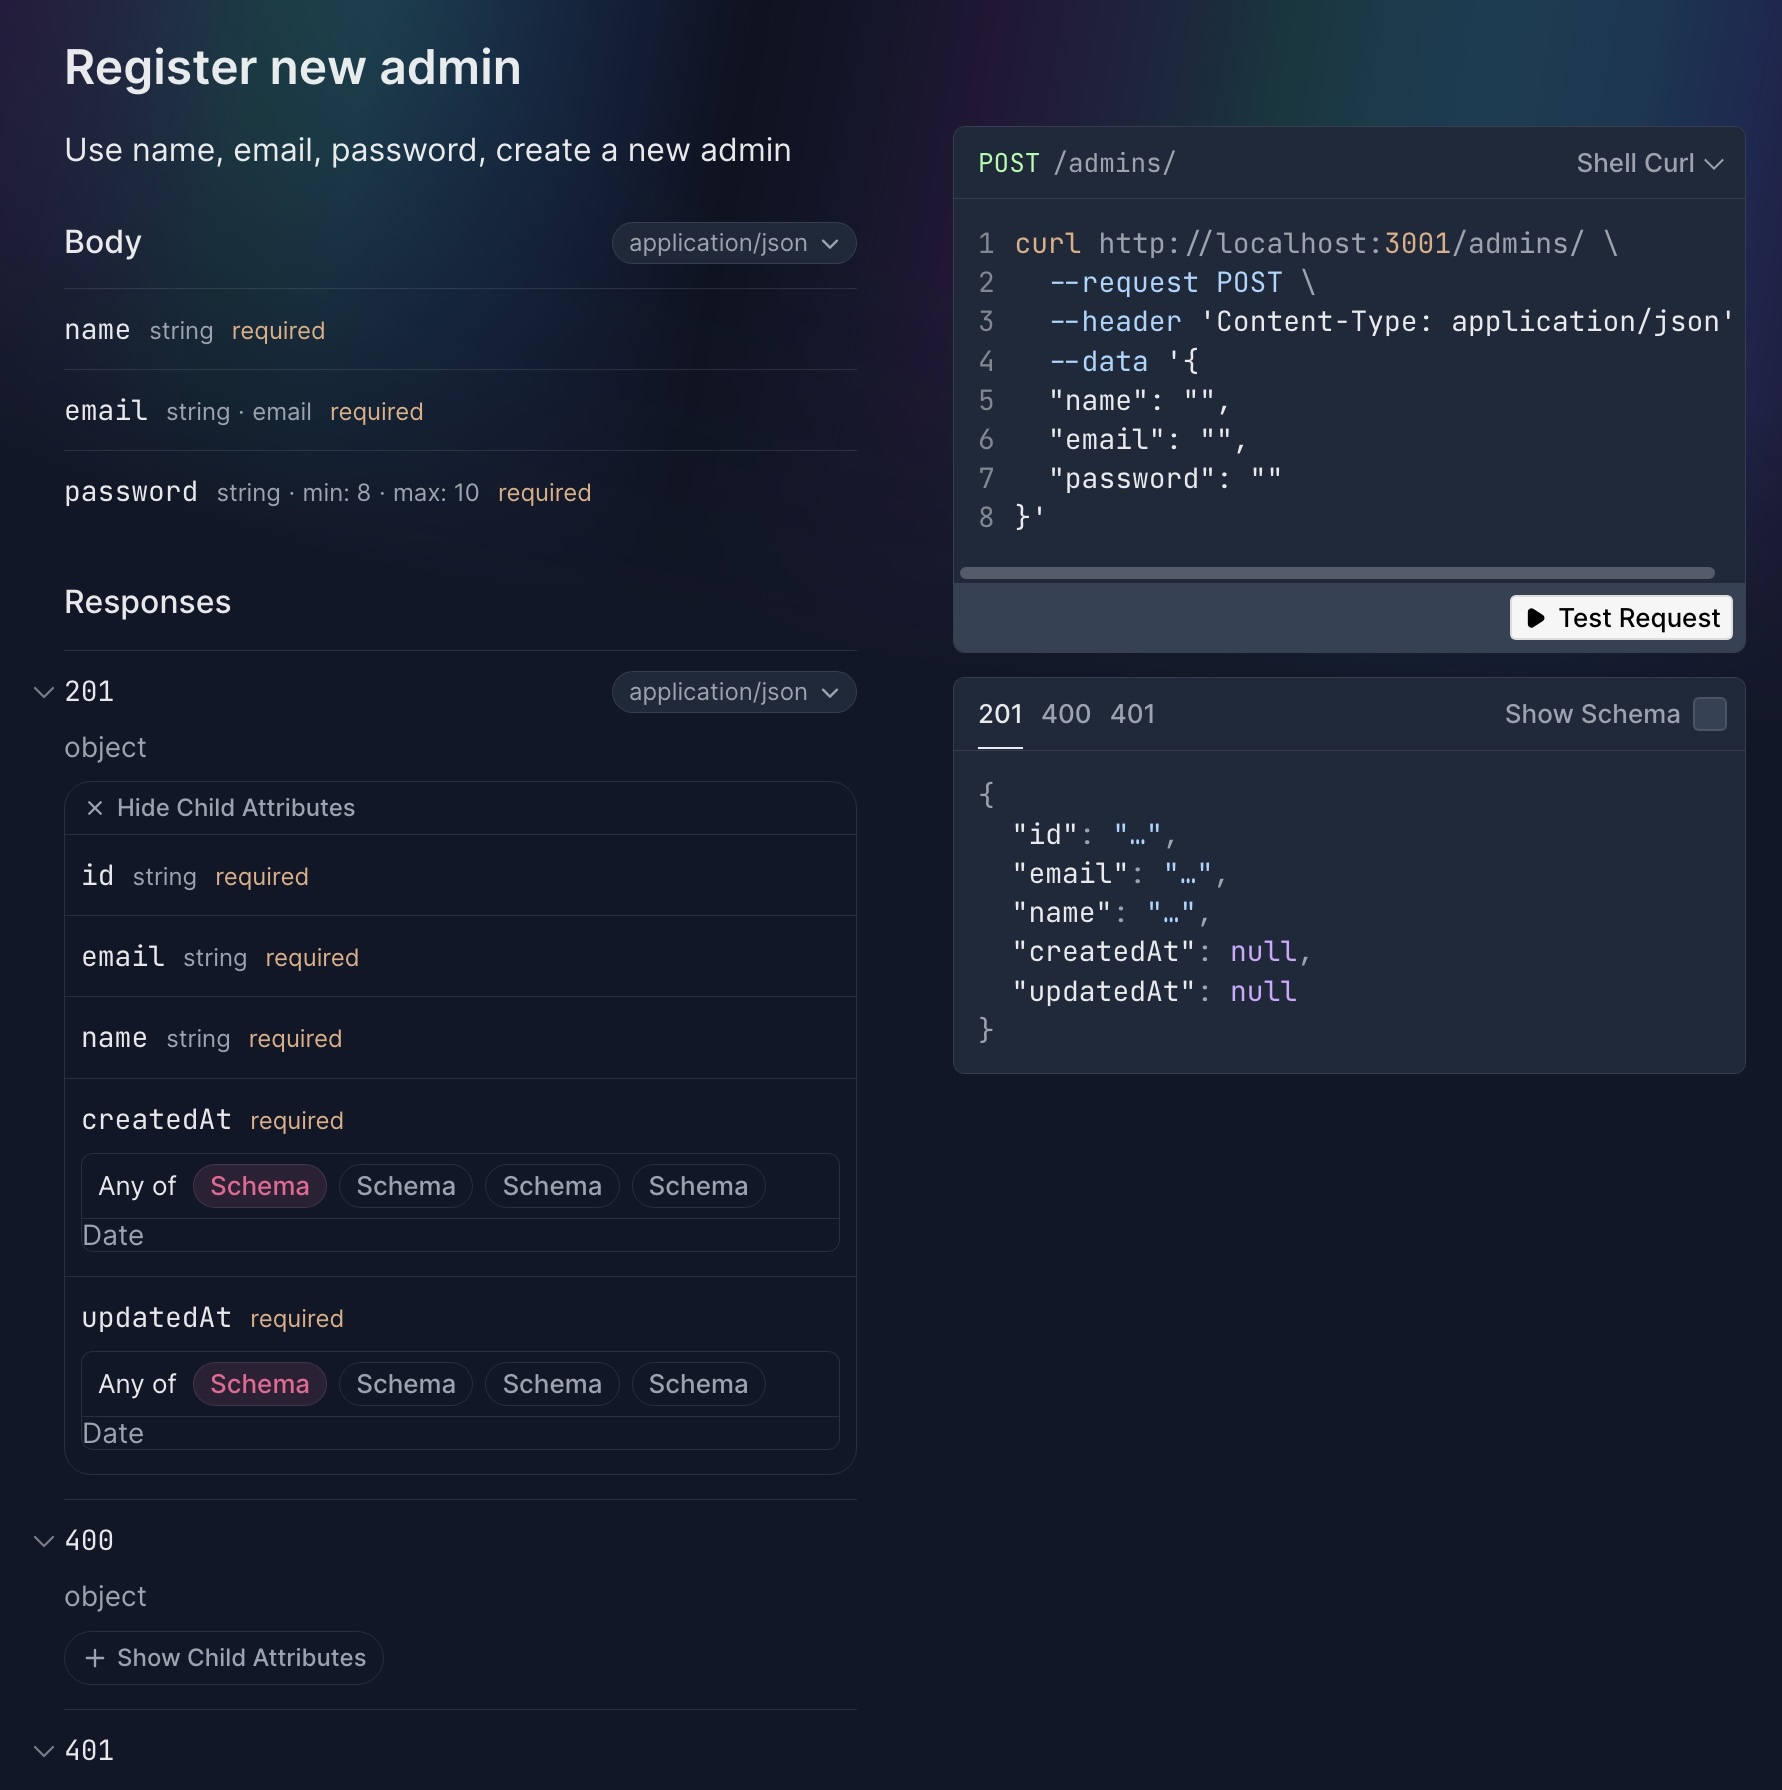
也是從 context 可以取出 body,而內容有可能 過多 ,所以會抽出去寫 registerSchema 再把它 import 回來使用。
這邊有一個補充,因為 response的 http status code 預設為 200,所以會從 context取出 set,將它改成 201
set.status = 201;
response
繼續使用上面的範例,看到 response 可以定義不同的 http status code 的回覆格式。
response: {
    201: createAdminResponse,
    400: BadRequestResponse,
    401: UnauthorizedResponse,
},

---
// admin.ts

export const createAdminResponse = t.Object({
  id: t.String(),
  email: t.String(),
  name: t.String(),
  createdAt: t.Date(),
  updatedAt: t.Date(),
});
就可以長出美麗大方的 response format
結論
驗證的地方不難,寫起來也挺爽,只要能掌握 typebox的寫法,其實還蠻像 zod,如果對這內容有興趣,可以參考前傳 優雅的三拍,寫好API - elysiajs